How to Polish Quartz Countertops Without Burn Marks: A Technical Guide to Heat-Free Finishing.
Polishing quartz countertops requires a fundamentally different approach than granite. While granite responds to friction and heat to develop a crystalline gloss, quartz is an engineered stone composed of roughly 90% crushed natural stone and 10% resin binders. This resin is heat-sensitive—excessive friction generates temperatures that melt or discolor the binder, leaving permanent yellow or white burn marks that cannot be polished out. This guide provides a clear, step-by-step methodology for achieving a factory-grade polish on quartz while strictly controlling heat, ensuring a flawless, burn-free finish every time.
1. Why Quartz Burns: The Resin Factor
Unlike natural granite, quartz does not “glaze” or crystallize under high heat. The resin matrix that holds the stone together softens at temperatures as low as 150–200°C (300–400°F). When polishing with excessive RPM, inadequate water, or incorrect pressure, the resin overheats locally. The result is a scorched surface that appears dull, whitish, or yellowed. Crucially, burn marks are subsurface damage—you cannot remove them with finer grits; you must grind them out with coarse abrasives and re-polish from the start. Prevention is the only practical strategy.
The sequence, tool selection, and speed control are not optional—they are a mandatory protocol for quartz. Below is the industry-standard grit progression using resin-bonded diamond pads, adapted specifically for engineered stone.
2. The Complete Grit Progression for Quartz (50 to 3000+)
| Grit Range | Stage Name | Purpose | Visual Result |
| 50–100| Coarse Shaping | Removes deep fabrication marks, uneven joints, or damaged resin. Establishes flatness. | Matte, uniformly flat, with visible but shallow scratches. |
| 200–400 | Medium Refining | Erases coarse scratches. Smooths the surface without generating excessive heat. | Smooth to touch, cloudy, and completely dull. |
| 800–1000 | Fine Conditioning | Eliminates medium scratches. Prepares resin surface for final gloss. | Smooth, uniform, hazy—no shine yet. |
| 2000–3000 | High-Polish | Produces a clear, reflective gloss. At 3000 grit, the surface achieves mirror clarity. | Bright, reflective, glossy finish with good clarity. |
| 5000–8000 | (Optional) Enhancement | Adds wet-look depth and intensifies color veining. | Deep, saturated gloss with enhanced contrast. |
3. Critical Rules for Burn-Free Polishing
Water is Mandatory, Not Optional
For quartz, dry polishing significantly increases burn risk. Use a constant stream of water to cool the pads and flush away debris. Wet polishing keeps surface temperatures below the resin’s threshold. If you must dry-polish, use specialized dry pads and work in short passes with forced air cooling—but wet polishing remains the gold standard.
Pressure Control: Light Touch Wins
Apply only the weight of the tool—do not lean into the grinder. Excessive pressure increases friction and heat without improving cut rate. Let the diamonds do the work. If you hear a high-pitched squeal or see steam, you are applying too much pressure or using too high an RPM.
Never Let the Pad Stop Moving
Hesitating on one spot for more than 1–2 seconds generates localized heat build-up, which melts the resin. Keep the tool in constant, sweeping motion, overlapping each pass by 50%.
4. Step-by-Step Burn-Free Polishing Sequence
Stage 1: Coarse Grinding (50–100 Grit)
– RPM: 1,500 – 2,000
– Duration: Work until the surface is completely flat and all visible damage is removed.
– Heat check: The surface should remain cool to the touch. If it warms, reduce pressure or increase water flow.
Stage 2: Medium Grinding (200–400 Grit)
-RPM: 2,000 – 2,800
– Key check: Inspect under raking light. If any coarse scratches remain, do not proceed. Re-work with 100 grit.
– Heat check: Slight warmth is acceptable, but never hot.
Stage 3: Fine Grinding (800–1000 Grit)
– RPM: 2,800 – 3,500
– Note: This is the transition stage. The surface will appear cloudy but should be uniformly scratch-free.
– Heat check: Use moderate speed; this stage generates less friction naturally.
Stage 4: High-Polish (2000–3000 Grit)
– RPM: 3,500 – 4,500 (Do not exceed 4,500 RPM for quartz)
– Critical: This is where burns most commonly occur. Keep the tool moving rapidly. The shine should appear gradually. If the pad starts to “grab” or skip, reduce speed immediately.
– Goal: Achieve a clear, reflective gloss without any white haze.
Stage 5: Buffing (5000–8000 Grit – Optional)
– RPM: 3,000 – 4,000
– Effect: Adds depth to color and veining. Lower speed is preferred to avoid over-glossing, which can look plastic-like.
5. The Golden Rule: Never Skip Grits (And Never Overheat)
The two most common causes of burn marks are:
1. Skipping grits–e.g., jumping from 200 to 3000. This forces the fine pad to work aggressively to remove deep scratches, generating dangerous heat. The result: a shiny surface with hidden burns and hazing.
2. Over-speeding at final polish–Running a 3000-grit pad at 6,000 RPM on quartz will almost certainly melt the resin. The resin bond in the pad itself also softens, causing glazing and ineffective cutting.
If you see a white or yellowish discoloration after polishing, you have a burn. The only remedy is to grind back to 100 grit and re-polish—a costly rework.
6. Matching RPM to Grit for Quartz (Safe Operating Range)
| Grit Range | Recommended RPM | Why |
| 50–200 | 1,500 – 2,500 | Low speed, high torque for material removal with minimal heat. |
| 400–1000 | 2,500 –3,500 | Moderate speed refines scratches efficiently without overheating. |
| 2000–3000 | 3,500–4,500 | High enough for gloss, but capped to prevent resin softening. |
| 5000–8000 | 3,000–4,000 | Enhancement requires less speed; focus on contact time. |
Safety Limit: Never exceed 4,500 RPM with any pad on quartz. Above this threshold, even with water, localized hot spots can form. Resin pads themselves are rated for 6,000 RPM on granite—but quartz requires a lower ceiling.
7. Common Mistakes That Cause Burns
– Using granite-speeds on quartz: Applying granite RPM settings (up to 5,500) directly to quartz guarantees burns.
– Insufficient water flow: A trickle is not enough. You need a steady stream to continuously cool the work surface.
– Polishing in direct sunlight on a hot slab: Ambient heat lowers the resin’s burn threshold. Work in shaded or temperature-controlled areas when possible.
– Worn pads: Worn diamonds require more pressure and time, increasing heat. Replace pads regularly.
– Forgetting to clean between grits: Residual coarse grit contaminates finer stages, causing deep scratches that force you to overwork the surface—and overheat it.
8. How to Verify Your Work and Detect Early Burns
After fine grinding (800–1000): Wipe dry and inspect under raking light. Look for any dark or yellowish spots—these are early heat stains. If found, re-grind with 200 grit and reduce speed.
After high-polish (3000): The surface should be uniformly glossy. Tilt the countertop toward a light source. If you see white haze, cloudiness, or uneven reflection, suspect either skipped grits or minor thermal damage.
Touch test: Immediately after polishing, place your hand on the surface. It should feel warm, not hot. If you cannot hold your palm on it for 5 seconds, you generated excessive heat.
FAQ
Q: Can I polish quartz with the same pads I use for granite?
A: Yes, the same resin-bonded diamond pads work, but you must reduce RPM and use ample water. Never transfer speed settings from granite to quartz.
Q: I see a white spot after polishing. Is it a burn or just haze?
A: If it does not wipe off with water or stone cleaner, it is a burn. Haze disappears when wet; burns remain visible. The fix is re-grinding from coarse grit.
Q: Can I use a variable-speed grinder for quartz?
A: Absolutely—and it is highly recommended. Fixed-speed grinders (e.g., 11,000 RPM) are dangerous for quartz. Always use a variable-speed polisher with a maximum of 6,000 RPM, and stay within the ranges above.
Q: Is dry polishing ever acceptable for quartz?
A: Only with specialized dry pads and a vacuum-assisted grinder, and even then, only for edge work in short passes. For large flat surfaces, wet polishing is strongly preferred.
Looking for Professional Diamond Tool Solutions?
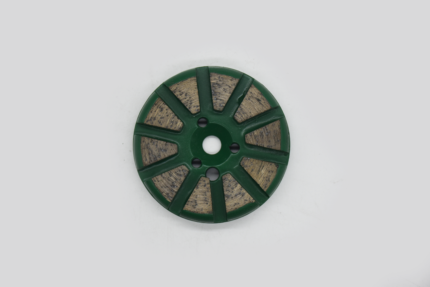
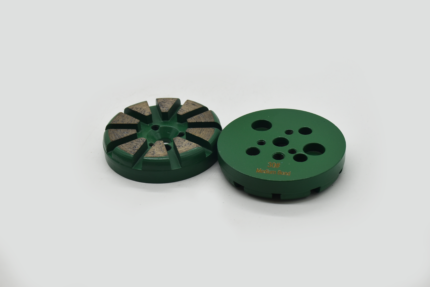
Proper speed control and grit progression depend heavily on the quality and consistency of your polishing pads. Low-grade pads generate uneven friction and unpredictable heat spots. For reliable, heat-managed diamond tools engineered specifically for quartz, contact Quanzhou Tianli Grinding Tools Co., Ltd. We offer professional-grade resin-bonded pads with optimized resin formulations for engineered stone, backed by decades of experience in the stone processing industry.
Control the heat, master the polish, and eliminate burns forever.