Diamond Polishing Pad Grit Sequence|Step‑by‑Step Guide for Stone & Concrete
A practical guide for marble, granite, quartz, and concrete floors
Quanzhou, China — From Tianli Grinding Tools: First of all,diamond polishing pads are available in many grits but the final finish is not created by the last pad alone. It is built step by step. Each grit removes the scratch pattern left by the previous grit. If diamond polishing pad grit sequence is rushed, skipped, or used with the wrong pressure, water flow, or RPM, the surface may look glossy at first but show scratches, haze, or uneven gloss later. For stone fabricators, countertop shops, and concrete flooring contractors, understanding the complete grit sequence is essential for consistent results and lower rework.Essentially, every step builds upon the previous one.
Follow professional stone polishing guidelines from the Natural Stone Institute to refine your diamond polishing pad grit sequence.
To begin with,The Four Stages of Diamond Polishing
In general, A typical resin-bonded diamond polishing pad sequence runs from 50 to 3000 grit. The sequence can be divided into four stages: coarse grinding, medium grinding, fine polishing, and final polishing.
Coarse Grinding: 50–100 Grit
Coarse grits clear deep scratches, saw marks, edge chips, and surface defects. These tools shape edges and smooth minor imperfections. Operators only use this aggressive stage when the slab needs heavy stock removal..Operators should use controlled pressure, continuous movement, and proper water flow or dust extraction. Dwelling too long in one spot can cause burn marks, discoloration, or uneven surfaces.
Medium Grinding / Pre-Polishing: 200–400 Grit
Next, medium grits remove the coarse scratches left by 50–100 grit. They prepare the surface for refinement and create a more uniform scratch pattern. Meanwhile,This stage is critical because it bridges rough grinding and polishing. If 200–400 grit is skipped, coarse scratches may remain and become visible after final polishing.
Fine Polishing: 800–1500 Grit
Furthermore, fine grits build clarity, depth, and initial gloss. They remove the scratches left by 200–400 grit and start to bring out the true color and reflectivity of the stone. Importantly,On marble, granite, quartz, and engineered stone, this stage determines whether the final finish will be clean and uniform.Maintain steady water flow and rinse the surface between grits to avoid cross-contamination.
Final Polishing: 3000 Grit and Beyond
Lastly, final polishing produces a mirror-like finish. A 3000-grit pad removes fine haze and brings gloss to its highest level. Some applications use even finer pads or buffing pads after 3000 grit. For concrete floors, final polishing may stop at 800 or 1500 grit if a satin or matte finish is required. For instance,For marble, granite, quartz, and engineered stone countertops, 3000 grit is commonly used for high-gloss finishing.
Recommended Grit Combinations by Material
1.Marble
For instance, marble is heat-sensitive and should generally be polished wet. For deep scratches or saw marks, start at 50 or 100 grit. For light surface refinement, start at 200 or 400 grit. A common high-gloss sequence is:
50 → 100 → 200 → 400 → 800 → 1500 → 3000
Wet polishing is strongly recommended. Keep water flowing and avoid high RPM or heavy pressure.
2.Granite
Conversely, granite is hard and dense. Rough grinding may require 50 or 100 grit, especially for edge work and surface preparation. For high-gloss finishing, wet polishing usually delivers better clarity and longer pad life. A common sequence is:
50 → 100 → 200 → 400 → 800 → 1500 → 3000
Then,Operators can use dry polishing for some granite jobs, but they need a variable-speed polisher, light pressure, continuous movement, and effective dust extraction.
3.Quartz and Engineered Stone
Meanwhile,quartz and engineered stone are heat-sensitive and resin-sensitive. Wet polishing is the safe default. For edge profiling or deep scratch removal, 50 or 100 grit may be used briefly. For most countertop finishing, start at 200 or 400 grit and follow the sequence:
200 → 400 → 800 → 1500 → 3000
Additionally,use lower RPM, light pressure, and clean water. Excessive heat can damage the resin matrix and cause burn marks even when the pad is rated for the material.
4.Concrete Floors
Besides, concrete polishing often begins with metal-bond diamond tools for coarse grinding and calibration, then switches to resin-bonded pads for polishing. A typical sequence may be:
30/50 metal → 100/200 metal or hybrid → 400 resin → 800 resin → 1500 resin → 3000 resin
For a satin finish, stop at 800 or 1500 grit. For a high-gloss polished concrete floor, continue to 3000 grit and use a densifier or guard as recommended. Concrete hardness, aggregate type, and desired gloss will affect the exact sequence.
Common Mistakes: Skipping Grits, Scratches, and Uneven Gloss
Specifically, One of the most common mistakes in diamond polishing is skipping grits. Then some operators try to save time by jumping from 50 grit directly to 400 grit, or from 100 grit to 800 grit. This does not work.And the finer pad cannot remove the deep scratches left by the coarse pad. The surface may appear shiny, but the scratches are still there. As a result,they often become visible under different lighting, after cleaning, or after the surface dries.
Other common mistakes include:
Meanwhile, never apply dry pads to heat-sensitive materials like marble, quartz or engineered stone.
The result of skipping grits is not a faster polish. It is more rework, uneven gloss, visible scratches, and higher consumable cost.
Best Practices for Consistent Results
To avoid these pitfalls, follow these best practices for consistent results.
Importantly, Start with the finest grit that removes the existing scratches. For deep scratches, begin at 50 or 100. For light refinement, begin at 200 or 400.
Furthermore, Keep the polisher moving. Use light, consistent pressure.
For instance,maintain clean water flow for wet polishing. Rinse between grits.
Then,use a variable-speed polisher and control RPM.
Meanwhile,match the pad, bond, and grit to the material.
Additionally,use proper dust extraction and respiratory protection for dry polishing.
Finally,inspect the surface under good lighting between steps.
Tianli Product Recommendations
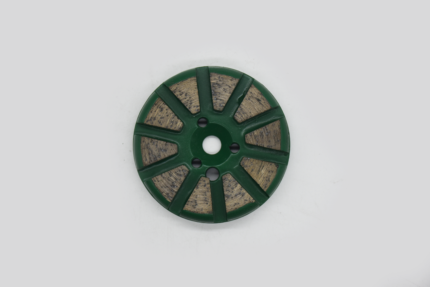
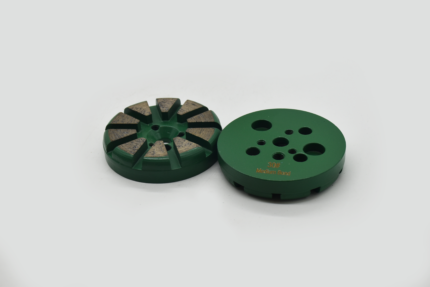
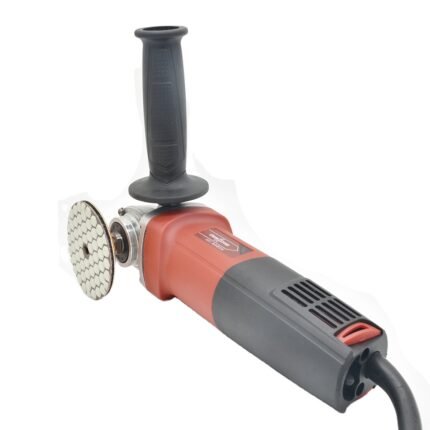
Lastly,for professional diamond polishing solutions, Quanzhou Tianli Grinding Tools Co., Ltd. offers resin-bonded diamond polishing pads for wet and dry applications.
- Wet Diamond Polishing Pads: Recommended for marble, quartz, engineered stone, and high-gloss countertop finishing.
- Meanwhile,dry Diamond Polishing Pads: Recommended for granite, concrete, on-site renovation, and outdoor work where water is not practical.
- Then,grit availability: Common sequences from 50 to 3000 grit, plus buffing pads for final gloss.
- Finally,technical support: Tianli helps fabricators select the right grit sequence, RPM, water flow, pressure, and polishing method for marble, granite, quartz, engineered stone, and concrete floors.
FAQ
You may also wonder:
In fact, Q: Can I skip from 50 grit to 800 grit if I polish longer?
A: No. Polishing longer with a fine pad will not remove deep coarse scratches. It may only create heat and uneven gloss. Follow the sequence step by step.
Q: What grit should I start with?
A: Start with the finest grit that removes the existing scratches. For deep scratches, begin at 50 or 100. For light surface refinement, begin at 200 or 400.
Q: Is 3000 grit always necessary?
A: Not always. For a mirror-like finish on marble, granite, quartz, and engineered stone, commonly use 3000 grit. For a satin or matte concrete floor, stopping at 800 or 1500 grit may be sufficient.
Q: How do I prevent uneven gloss?
In most cases, A: Keep the polisher moving, use consistent pressure and overlap, control RPM, maintain clean water flow, and rinse the surface between grits.
Q: Are wet pads always better?
A: Wet pads are better for heat-sensitive materials such as marble, quartz, and engineered stone. Dry pads are convenient for granite, concrete, outdoor floors, and job sites without water, but they require dust control and careful RPM management.
Conclusion
In short, a complete diamond polishing pad grit sequence is a scratch-removal system. Coarse grits remove deep defects. Next,medium grits prepare the surface. Meanwhile,fine grits build clarity and gloss. Final polishing creates the mirror finish. Skipping grits may seem faster, but it usually leads to visible scratches, uneven gloss, and costly rework. By matching the grit sequence to the material—marble, granite, quartz, engineered stone, or concrete—fabricators can achieve a cleaner finish, longer pad life, and lower total cost per square meter.
Therefore, for professional diamond polishing pad solutions, Quanzhou Tianli Grinding Tools Co., Ltd. provides wet and dry resin-bonded pads, full grit sequences from 50 to 3000, and technical support for marble, granite, quartz, engineered stone, and concrete polishing. Contact our team for guidance on grit selection, RPM, water flow, and cost-efficient polishing performance.