How to cut quartz without chipping
Learning how to cut quartz without chipping is an essential skill for stone fabricators working with engineered quartz surfaces. Chipping is one of the most common problems fabricators face when cutting engineered quartz. Unlike natural stone, quartz is a hard, brittle composite made of quartz particles and resin. It does not “heal” or self‑level. Every chip must be mechanically removed, repaired, or hidden by re‑profiling the edge. The good news is that chipping is almost entirely preventable with the right tools, water management, support, and disciplined technique.
Just as swirl marks in granite are the result of avoidable errors, chipping in quartz is not inevitable. It is a sign that something in the cutting process is wrong—and it can be corrected.
1. What Exactly Is Chipping?
Chipping refers to small, irregular breaks along the cut edge of quartz. Some chips are micro‑sized and visible only under raking light; others are large gouges that ruin the edge profile. Chipping can occur on the top surface, the bottom surface, or along the vertical cut face.
Because quartz is brittle, it does not deform like metal or plastic. Instead, when the cutting tool creates too much vibration, heat, or pressure, the material fractures. These fractures often start at the entry or exit point of the blade and spread along the cut line.
2. Primary Causes of Chipping
A. Wrong Blade or Dull Blade
The most common cause is using the wrong diamond blade. Quartz requires a blade designed specifically for engineered stone—typically a wet‑cut diamond blade with a continuous rim and a bond hardness matched to quartz. A blade meant for granite, marble, or general construction may cut too aggressively or glaze over.
In addition,A dull or glazed blade is equally dangerous. Instead of cutting, it skids and rubs, generating heat and vibration. This causes the quartz to fracture rather than shear cleanly.
B. Dry Cutting or Insufficient Water
Quartz must be cut wet. Dry cutting generates excessive heat, which can damage the resin binder in the quartz and soften the blade bond. It also creates dust and increases friction, leading to chips. Even with a wet saw, if the water flow is too low or the water is dirty, the blade cannot cool or flush debris properly.
C. Excessive Feed Rate or Force
Pushing the blade through quartz too quickly is a direct cause of chipping. The blade needs time to grind through the hard quartz particles. Forcing the cut creates vibration, heat, and uneven pressure—all of which promote fracture.
D. Incorrect RPM
Using the wrong RPM can also cause chipping. Too high an RPM generates heat and vibration; too low an RPM can cause the blade to grab or stall. Always follow the blade manufacturer’s RPM recommendations for the blade diameter and material.
E. Poor Support and Vibration
Quartz slabs are heavy and brittle. If the slab is not fully supported, or if the table flexes, the material will vibrate during cutting. Vibration is one of the fastest ways to chip an edge. Cutting over an unsupported area—especially at the end of a cut—almost always causes blowout.
F. Contamination and Debris
Dirt, dried slurry, or small pieces of hardened adhesive under the slab can create high spots. These cause the blade to lift or bind, leading to chipping. A clean cutting table and a sacrificial backer board are essential.
G. Poor Entry and Exit Strategy
The blade enters and exits the material at the most vulnerable points. If the blade exits into open air without support, the edge can tear out. Similarly, starting a cut without a guide or relief can cause the blade to walk and chip the surface.
3.Prevention: A Systematic Approach
Chipping is 100% preventable with a disciplined workflow. Implement these measures before you start cutting.
Use the Right Diamond Blade
Select a wet‑cut diamond blade engineered for engineered quartz. A continuous rim blade generally produces smoother cuts than a segmented blade. Keep dedicated blades for quartz if possible, and never use a blade that has been used on concrete or other abrasive materials.
Maintain Constant, Clean Water Flow
Water does two things: it cools the blade and flushes away slurry. Use enough water to keep the cut line wet at all times. Change the water frequently. Dirty water recirculates abrasive particles that can scratch and chip the edge.
Support the Workpiece Completely
Place the quartz on a rigid, flat table with a sacrificial backer board—such as plywood or MDF—directly beneath the cut line. Clamp the slab securely. Ensure there are no gaps or high spots. Support both sides of the cut so the material cannot shift or sag as the blade passes through.
Control Feed Rate and RPM
Let the blade do the work. Feed steadily and moderately. Do not push. Reduce feed rate as you approach the exit edge. Match RPM to the blade manufacturer’s recommendation. For most quartz cutting, a moderate RPM with a steady feed produces the cleanest results.
Use a Guide or Track
Freehand cutting increases the risk of vibration and blade deflection. Use a track saw, rail guide, or straight edge to keep the blade moving in a straight, consistent line. This reduces side load on the blade and minimizes chipping.
Tape and Score When Necessary
Applying masking tape along the cut line can help reduce surface chipping. Some fabricators also score the cut line lightly before making the full pass. Always test this method on scrap first, as results vary by quartz brand and blade.
Plan Entry and Exit
Start and finish the cut over sacrificial material whenever possible. This supports the edge as the blade enters and exits. If you must cut to an unsupported edge, reduce feed rate dramatically at the end and consider backing the exit with a piece of scrap quartz or wood.
Inspect the Blade Before Every Use
Check for missing diamond segments, cracks, glazing, or embedded debris. A glazed blade feels smooth or shiny. Refresh it by cutting a dressing stone or a scrap piece of abrasive material with light pressure and water.
4. How to Fix Chipped Quartz After It Happens
If chipping occurs, do not panic—and do not try to hide it with wax or sealer. It will reappear as soon as the surface is cleaned or used. Fix it systematically.
Step 1: Assess the Chip Depth
Micro‑chips can often be removed with diamond hand pads. Deep chips may require re‑cutting the edge or filling with color‑matched quartz repair adhesive.
Step 2: Re‑Cut If the Edge Allows
If the chip is along a straight cut and there is enough material, re‑cut the edge with a fresh blade, slower feed, and full water flow. Drop back to a slower, more controlled pass. This removes the fractured zone completely.
Step 3: Use Diamond Hand Pads or Polishing Pads
For small chips, use a sequence of diamond hand pads from coarse to fine to ease the edge and blend the chip. Keep the pads wet and use light pressure. Do not over‑grind the edge profile.
Step 4: Repair Larger Chips with Color‑Matched Adhesive
For chips that cannot be cut out, clean the area thoroughly and dry it. Apply a color‑matched quartz repair adhesive. Cure according to the manufacturer’s instructions. Once cured, sand and polish the repair to match the surrounding surface.
Step 5: Final Polish with Reduced Pressure
After repair or re‑cutting, polish the edge with resin‑bonded diamond pads. Use light pressure and keep the tool moving in broad, overlapping arcs. Inspect under strong directional light before moving on.
5. The “Test Area” Rule
Before cutting a full countertop, always test your blade, RPM, water flow, and feed rate on a scrap piece or an inconspicuous edge. This reveals any tooling issues, vibration problems, or technique errors before they ruin the main surface. A 5‑minute test can save hours of rework.
FAQ – Cutting Quartz Without Chipping
Q: Can I cut quartz with a dry diamond blade?
A: No. Dry cutting generates excessive heat and dust, increases chipping, and damages the blade. Always cut quartz wet with continuous water flow.
Q: What blade is best for cutting quartz?
A: A wet‑cut diamond blade designed specifically for engineered quartz. A continuous rim blade with the correct bond hardness generally produces the smoothest cut.
Q: Why does quartz chip at the end of a cut?
A: The exit edge is unsupported, so the blade tears out the material. Use a sacrificial backer board, reduce feed rate at the end, and clamp the slab securely.
Q: Can I use an angle grinder to cut quartz?
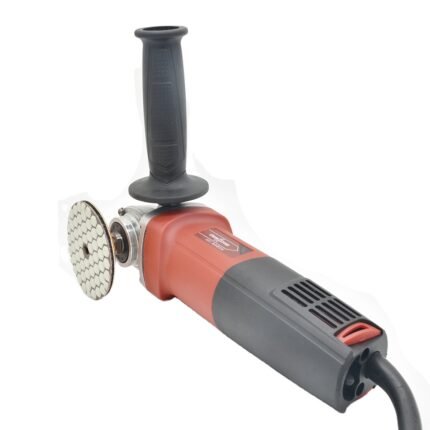
A: Yes, but it carries a higher risk of chipping. Use a diamond blade, constant water feed, and a guide. For visible cuts, a wet saw or track saw is safer and cleaner.
Q: How do I prevent chips on sink cutouts?
A: Drill relief holes at the corners, use a template or guide, support the cutout from below, maintain full water flow, and feed slowly. Do not force the blade.
Conclusion
Chipping is not inevitable—it is the result of avoidable errors in blade selection, water management, support, feed rate, and technique. By using the right diamond blade, maintaining constant clean water flow, supporting the slab completely, controlling RPM and feed rate, and testing on scrap, you can master how to cut quartz without chipping and eliminate chipping from your workflow.
When chips do occur, the fix is systematic: assess the damage, re‑cut if possible, repair with color‑matched adhesive, and polish with patience. There is no shortcut—but there is a clear, repeatable path to a clean, professional cut.
Looking for Professional Diamond Tool Solutions?
To cut quartz without chipping and achieve consistent, high‑quality results, start with the right tools. Quanzhou Tianli Grinding Tools Co., Ltd. offers premium diamond cutting blades and resin‑bonded diamond pads engineered for quartz and other hard stones. For technical guidance on blade selection, RPM settings, and edge repair, contact our team—we help fabricators cut smarter, not harder.